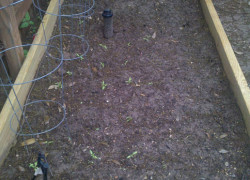
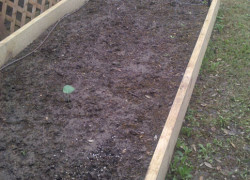
The spring is here, trees are budding new leaves, front yards are getting colorful with spring flowers, people are getting started with gardening after the cold winter but this year we see more enthusiasts getting into ‘Raised Vegetable Beds’ for their vegetable gardens. One reason could be the raised awareness for eating local organic vegetables and what more local can one get than one’s own backyard! Whatever the reason, this trend is catching on to even amateur gardeners.
Yes I am one of the many enthusiasts who decided to have raised vegetable beds in my backyard too! I have been growing vegetables and herbs in my backyard since few years but I have not been reaping a whole lot of fruit for my labor. Hence this year I decided to work harder and hope to reap more gains.
Reasons to make raised vegetable beds:
- Backyards with rocky or poor soil can now have vegetable gardens too with enriched soil in raised beds.
- Ability to Position the bed in your garden to take advantage of sun/shade.
- Lesser weeds in raised beds
- No worries about hitting sprinklers and tree roots during plating and tilling.
- Earlier start with planting seeds and vegetable plants.
Steps to make raised vegetable beds:
- To make raised vegetable beds you will need, wood, drilling machine, outdoor screws, brackets, organic enriched soil.
- To make raised vegetable boxes first choose the right kind of material. One has to check out the options available in the market. When I was looking to make raised beds and shopping around in Home depot and Lowes kind of stores, I discovered I had three options.
- One was the more expensive, yet long lasting ecowood / recycled wood which are timbers made from sawdust and recycled plastic.
- The very affordable untreated wood, which may not last many years, but safe to grow your vegetables and fruit. I chose this option since it looked easier and affordable to work with, also since I was adventuring to make these raised beds on my own with a teenager’s help 😉
- The third was a chemically treated wood which is very affordably priced wood and long lasting (eg. yella wood ). But I was told this wood may not be naturally safe to plant vegetables or fruit since there is a risk of chemicals seeping into your vegetable plants root system and the produce too. This wood can be apparently used if it’s lined with a black plastic lining which prevents interaction of the enriched soil with the chemically treated wood.
- To make raised vegetable beds, You can either look into the option of doing it D-I-Y or outsource and hire a service like Austin Urban Gardens ( who recently featured in Austin American Statesman) or your local landscapers
- If you decide to ‘do-it -yourself’. First you need to take measurements for the required size of your beds for your backyard.
- You need to make a list of how many feet of wood you need and decide accordingly how many planks you need to buy in your trip to the hardware store like Home depot/Lowes. The planks come is different sizes of 8 feet, 10 feet or 12 feet, hence you can size your boxes accordingly to avoid wastage of wood.
- Don’t forget the outdoor screws to drill the wood planks together to make raised vegetable boxes.
- If you are making boxes which are not perfect rectangular or square boxes, but boxes to suit your backyard requirements like for example a triangular box which I made, remember you need brackets besides screws to hold this together.
- The Home depot/Lowes kinds of stores actually help you cut your wood planks to your requirement. If for example you need to make a 6ft by 4 ft box, you can get a 12 feet plank and 8ft plank and ask it to be cut according to your requirements and voila you just have to put it together at home with screws.
- Make a groove in your backyard to match the measurements of your box so the box fits snugly in your ground preventing water and soil from flowing out.
- Fill it with enriched organic mix soil available in the garden and mulch stores.
- The raised bed is ready!
After learning how easy it was for an amateur like me to make raised vegetable garden beds on my own of course with help from a smart and hardworking kid, you can do it too.
Now plant your seeds and saplings and start gardening 😉


